
10 minute read
Most established wholesale businesses are operating on systems that were built for a different era of commerce, often with separate platforms for B2C and B2B. We’ve helped businesses move from legacy platforms consolidating their wholesale and retail operations into a single platform with Shopify.
This guide takes you through how we set up Shopify B2B for our clients properly, highlighting common use cases and where you'll need to extend with apps or custom functionality.
Shopify B2B is available on the Shopify Plus plan, if you're looking to deliver B2B on the Basic, Grow or Advanced plans we recommend using SparkLayer.
First we'll cover standard Shopify B2B features:
- Store setup
- Setting up Companies & Locations
- Catalogs - company specific products and pricing
- Setting up tax
- Paying on account
- Customer permissions
- Sales Reps
- My account
Then we'll move on to some common additional b2b features and how to implement them:
- Quick Ordering
- Quotes
- Personalisation
- Loyalty for B2B
This is by no means an extensive list, Shopify provides various ways to implement features, these include using an app, meta objects combined with theme customisation, flow or a private app.
Standard Shopify B2B
Store setup
Shopify allows for two approaches to setting up your wholesale store; running both B2C and B2B from a single blended Shopify store or running B2B as a dedicated separate store.
This is an important decision as it's hard to change from a dedicated store to a blended store at a later date. So its best to get this right from the start.
Choose a blended store when the following is true
- You want to manage both B2C and B2B from a single Shopify admin
- You want both B2C and B2B to use exactly the same branding and layout on the frontend of the website
- You want both B2C and B2B to use the same payment gateway (ie. all payments to be settled into the same bank account)
- You want both B2C and B2B to share product data, inventory, apps and customers
It's important to note that the following:
- You can still have separate pricing foreach customer with a blended store
- You can still have unique product catalogues foreach customer with a blended store
- You can run separate reports for B2B in Shopify Analytics
Choose a dedicated store when the following is true
- You want to manage both B2C and B2B from separate Shopify admin's
- You want both B2C and B2B to have different branding and / or layout on the frontend of the website (even if the differences are small)
- You use different payment gateways (ie. payments to be settled into the different bank accounts for B2C and B2B)
- You have different features or functions for B2B that are not needed for B2C
- You want to have a separate inventory flow for B2B
Companies & Locations
Shopify B2B adds two key entitles that provide the foundation for the b2b feature set; Companies and Locations.
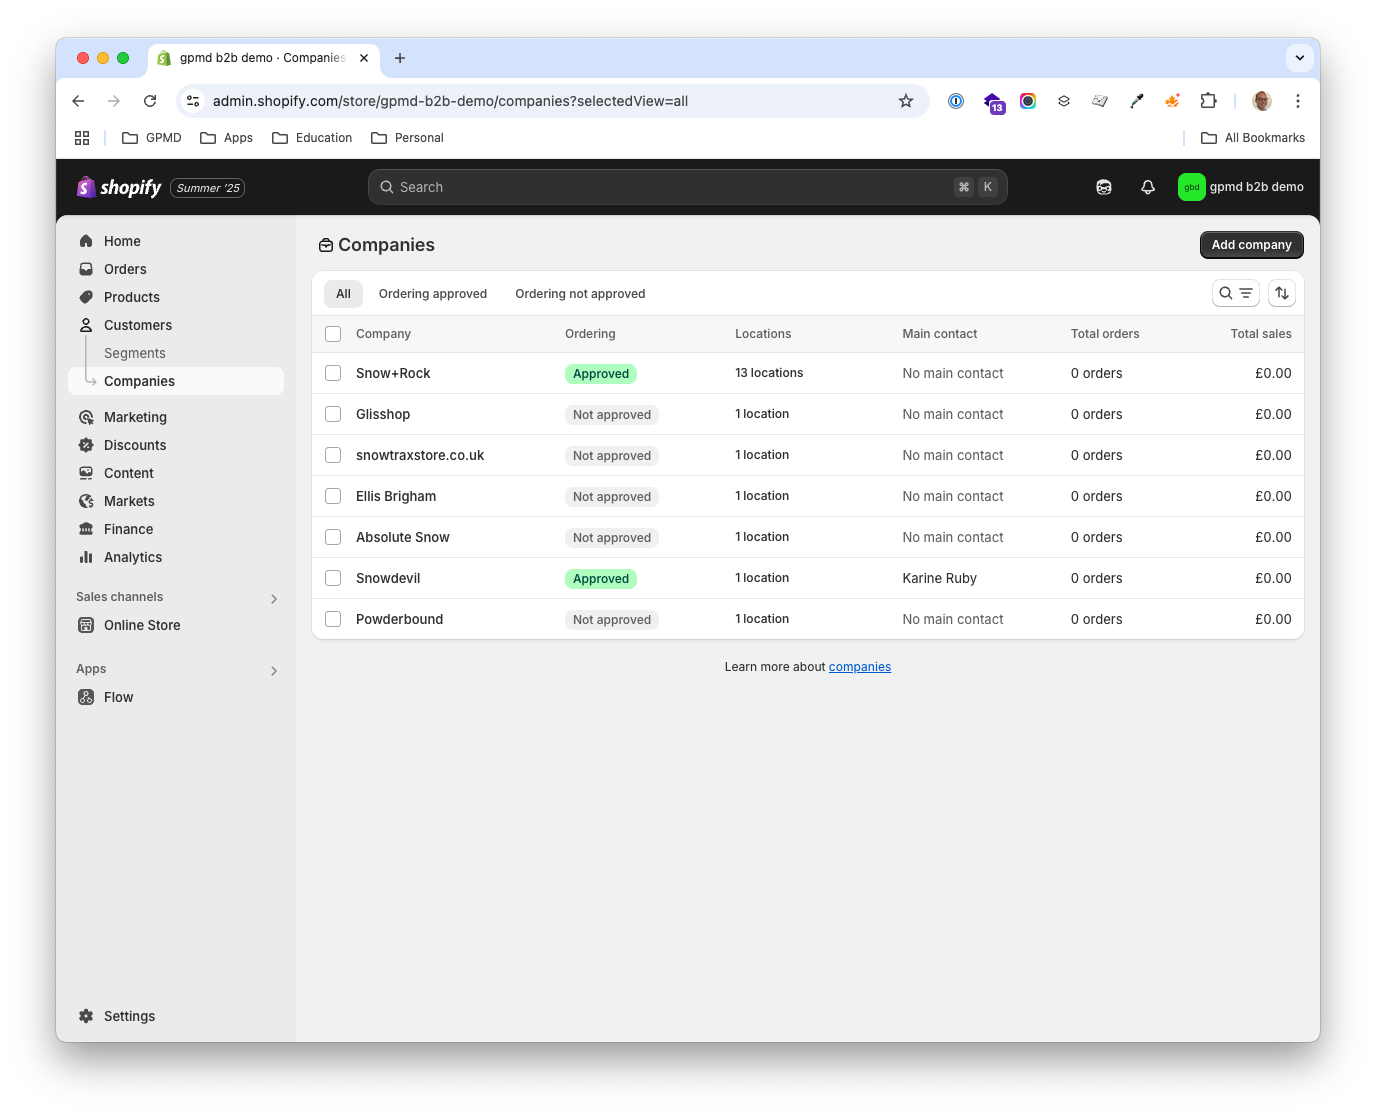
A Company is the foundational entity that allows wholesale, as in B2B your are selling to companies. Access is through Customers > Companies in the Shopify Admin, here you can add & edit Companies and control the following settings:
- Locations: You can add one or more locations
- Customers: assign customers (individual people)
- Staff: assign your staff members (eg Sales Reps)
- Markets: assign to specific markets
- Catalogs: assign a Catalog (see here for more on catalogues)
- Payment Terms: allow this company to pay by invoice
- Checkout options: Restricted shipping addresses and save orders in draft for manual review
- Notes: Add internal notes to each company (only visible to your staff)
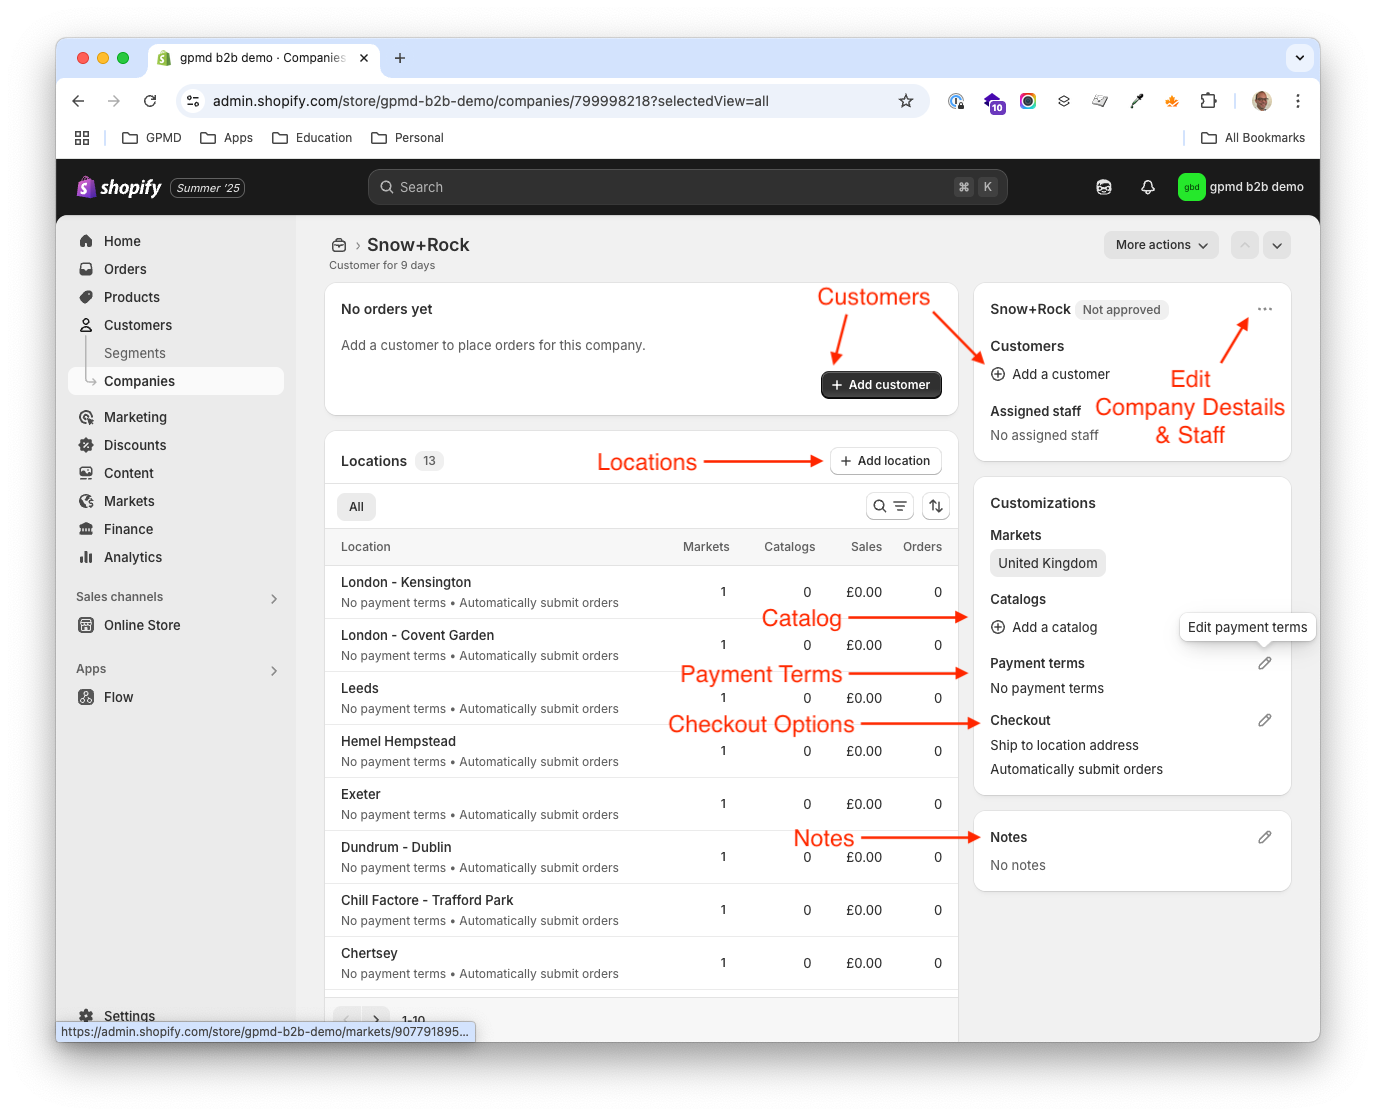
Once you have set up the company you can then add Locations, these are the Companies' place of business; offices, warehouses, shops, restaurants, bars, building sites or any physical location. Access is through Customers > Companies and the Locations area on the Company screen, here you can add & edit Locations and control the following settings
- Customers: assign customers (individual people) to one or more locations
- Addresses: shipping & billing addresses for the locations
- Payment Methods: saves a payment method against the location and allows all customers assigned to the location to use this method to pay for orders
- Tax Details: Control if VAT (called Tax in Shopify) is charged to this Company Location or not
- Staff: assign your staff members (eg Sales Reps)
- Markets: assign a Location to a specific market
- Catalogs: assign a Catalog (see here for more on catalogues)
- Payment Terms: allow this company to pay by invoice
- Checkout options: Restricted shipping addresses and save orders in draft for manual review
- Notes: add internal notes to each location (only visible to your staff)
- Timeline: add comments, attachments (only visible to your staff)

The ability to add multiple locations foreach company is one of my favourite features, it may seem obvious that this would be a common requirement, however the ability to do this was for many years a custom requirement.
Common use cases for companies and locations:
- All wholesale or trade businesses that want to group orders and users under a single company
- A wholesale business that sells to companies with one or more retail locations (eg a food service business), each company has a different price list
- A building supplies business that sells to developers with one or more building site locations, each location has a unique sub set of products available
Limits for Companies and Locations
- You can have an unlimited number of companies.
- A company can have a maximum of 10,000 company locations.
- A company can have a maximum of 10,000 customers.
- A company location can have a maximum of 25 catalogs.
- A company location can have a maximum of 50 customers.
This means that growing your wholesale business doesn't outgrow the platform.
Catalogs
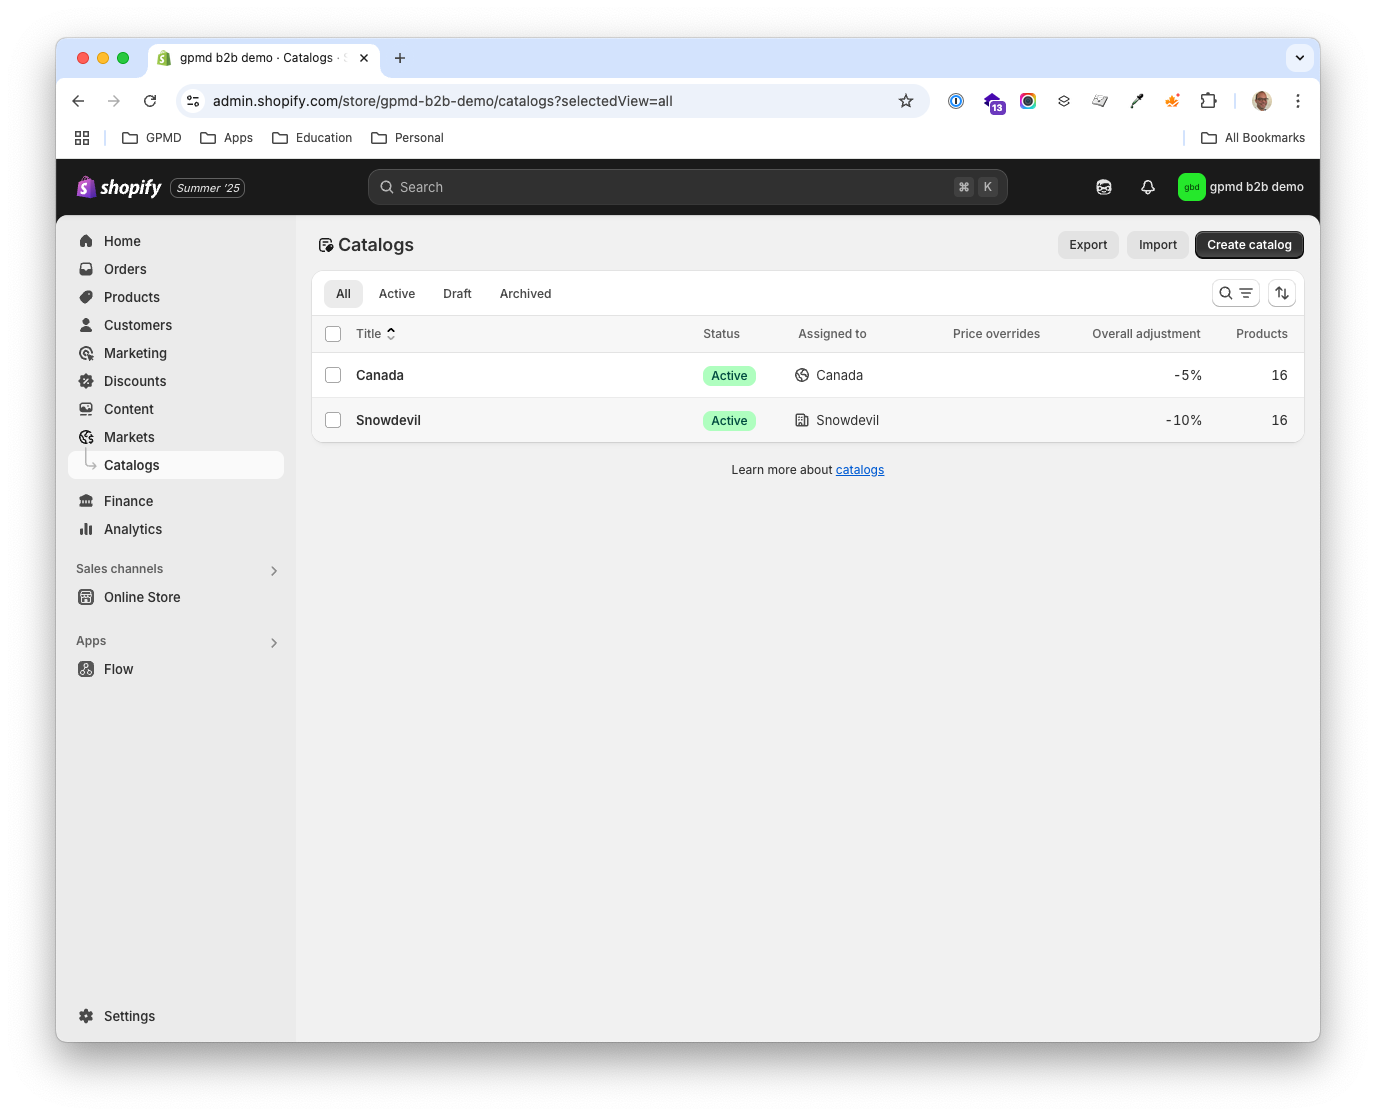
The third key part of Shopify B2B is catalogs. This allows you to create a specific view your product catalog and assign it to a Company or Location (You can also assign a catalog to a market), allowing you to create individual products catalogs and/or prices. Access is through Markets > Catalogs, here you can add & edit Catalogs and control the following settings
- Assign: the catalog to a market, company or locations
- Products: Include or exclude product from the full product catalog to create sub set catalogs for individuals, companies, locations or markets.
- Rule Base Pricing: Adjust pricing using rules to increase or decrease the default price for a product or variant by a set percentage
- Fixed Pricing: Set a specific price for an individual product in this catalog

The ability to quickly create a catalog specific to a company or location is another of my favourite features, a very common request, and the catalog's feature makes it easy to create a limited product selection for a customer so their team can only purchase from a pre-agreed list of products.
Common use cases for catalogs:
- Have different price bands for your customers, eg 5%, 10% and 15% assigning each customer to one price band
- Each customer has a specific price for each product
- Restrict customers to a specific list of products their staff can purchase and give a unique price to each product foreach company
Tax / VAT for Wholesale
For any business (be it B2B or B2C) you will usually setup a standard tax rate for your domestic market. You can also charge customs tax and duties for international customers:
- Domestic Tax: the tax due in your domestic market, this is VAT in the UK and Europe and Sales Tax in the US.
- Custom Tax & Duties: if you ship from one country to another then you need to pay import duties
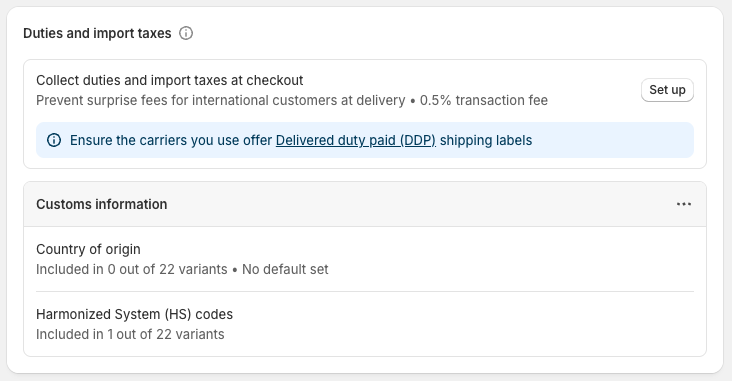
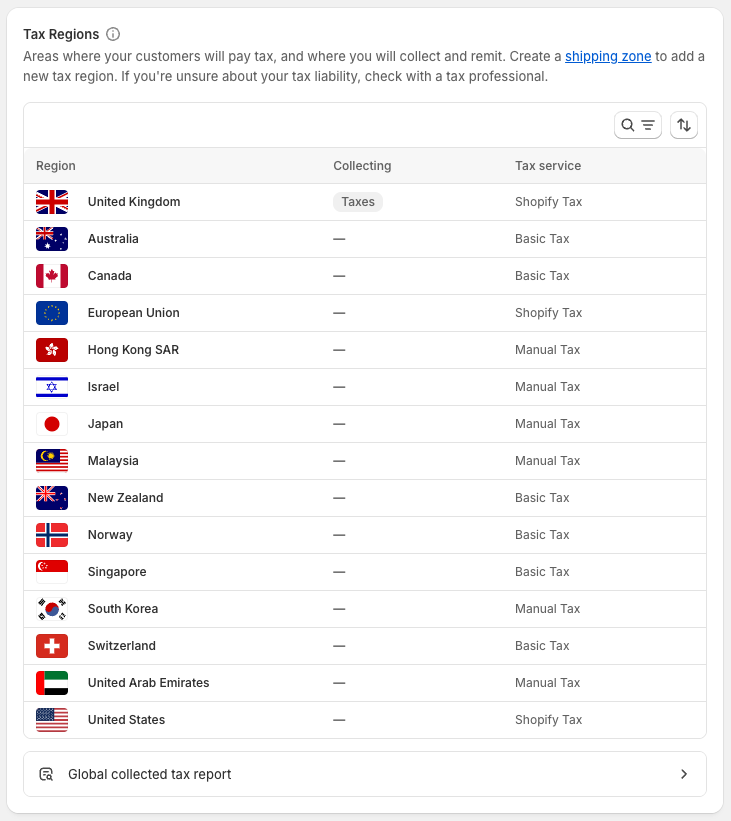
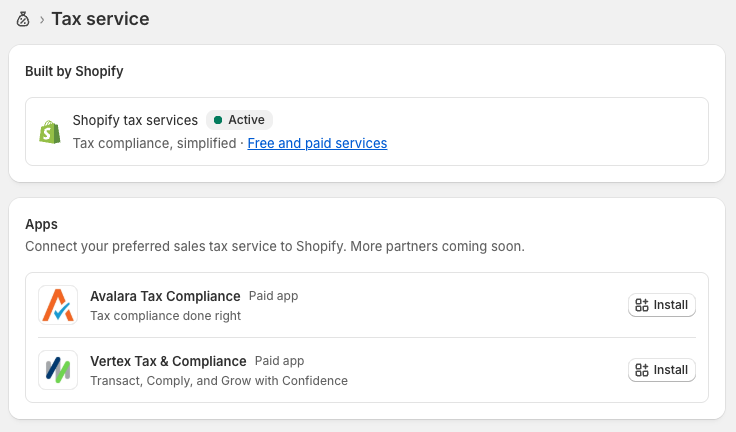
The setup for both of these is under Settings > Taxes and duties in the Shopify admin foreach region you operate in you will need to select which tax service you want to use
- Manual Tax (Free)
- Basic Tax (Free)
- Shopify Tax (Fees apply to sales over £100,000, see uk pricing, fees capped at £5000 per year per region)
- Or a choice of two other tax services (Avalara or Vertex)
Shopify Tax has two features relevant for Shopify B2B however it does add additional fees, the main features it offers that are important for B2B are:
- VAT number validation for B2B customers (confidently apply zero rates to customers with a valid VAT numbers)
- VAT Invoices (Automatically generate VAT invoices for all orders)
You can opt for Basic Tax, which allows you to apply a zero rate to B2B customers, however it doesn't validate VAT numbers so you'll need to do this manually.
Common b2b use cases for tax
- The typical setup in the UK is to charge VAT (called tax in Shopify) to all customers unless they are VAT registered, if you have a valid VAT number for the company you don't have to charge VAT
- Often wholesale customers want to see prices on the frontend with or without tax, if required this will need to be built into your theme
Paying on account or invoice pay
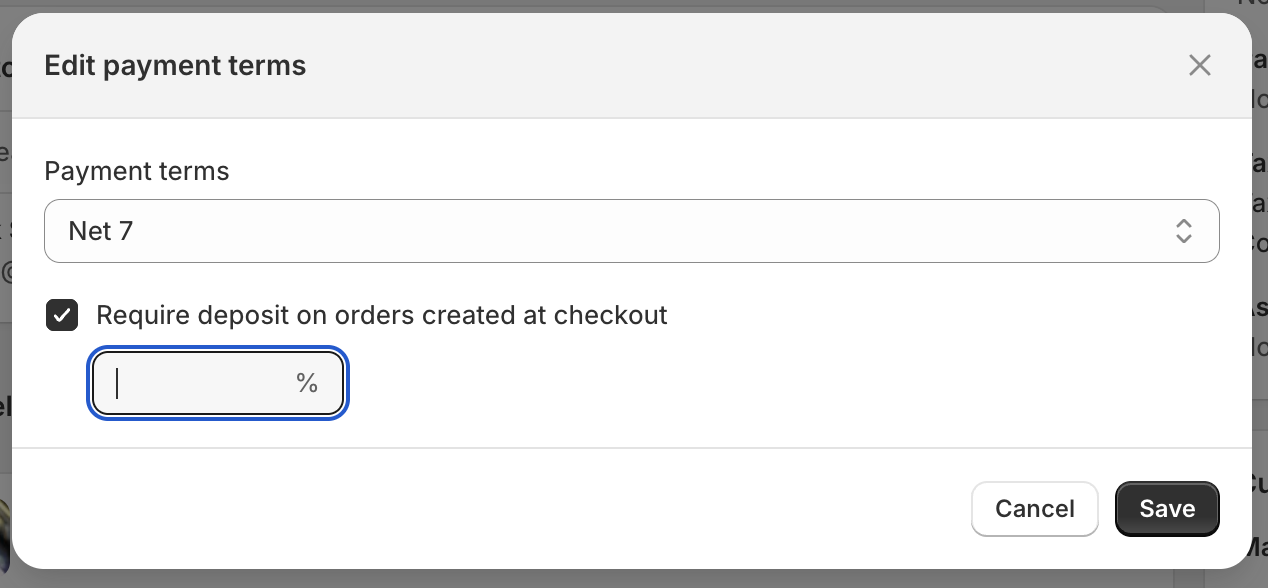
The payment terms feature allows you to give you customers specific terms for payment, Shopify also gives you the option to require a deposit so you can request part payment when an order is placed. Access to payment terms is through Customers > Companies here you can edit the payment terms for either a Company or a Location:
- You can choose from the following options for Payment terms
- No Payment Terms - Customer must pay when ordering
- Due on Fulfilment - Customer must pay when the goods are shipped
- Net 7 - Customer must pay in 7 days
- Net 15 - Customer must pay in 15 days
- Net 30 - Customer must pay in 30 days
- Net 45 - Customer must pay in 45 days
- Net 60 - Customer must pay in 60 days
- Net 90 - Customer must pay in 90 days
- Deposits: You can choose to require a deposit and specify what % the deposit should be
Common use cases for invoice pay
- Allow your customers to purchase goods now and pay within defined payment terms
- Require customers to pay a deposit on ordering and the balance on the terms you specify
Setting up permissions
Shopify does allow you to set permissions foreach customer at each Company Location, currently the options are limited to:
- Order Only: Can place orders and view their own order history
- Location Admin: Can place orders, view all orders for the Company Location, edit billing and shipping addresses and manage vaulted credit cards.

There is no bulk way to assign customer and control permissions, you have to do this one at a time through the admin, to automate this you can setup rules in Flow or use the API.
Common use cases for permissions
- Give employees the ability to place orders for one or more specific locations
- Allow all employees at a location to place orders using a company credit card
- Give managers the ability to manage all aspects of a specific location
- Control which employees can access or manage each Company Location
Sales Reps
You can give your Sales Representatives full or limited access to each company setup within your Shopify B2B store. You can assign any Staff member in your Shopify account to manage B2B areas of your Shopify admin and individual Companies and Company Locations.
Add Staff under Settings > Users and permissions and assign then to companies through Edit assigned staff on the Company or Company Location screens.
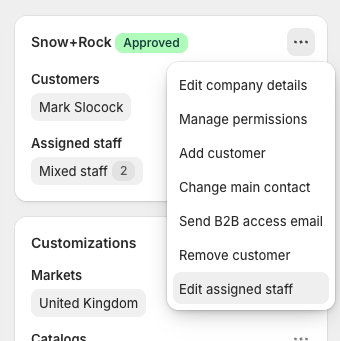
Here a simple tick box allows you to assign any staff member to a company. You can also assign staff at a company location level.
Assigned staff can create and view orders, view customers, product catalogs and inventory.
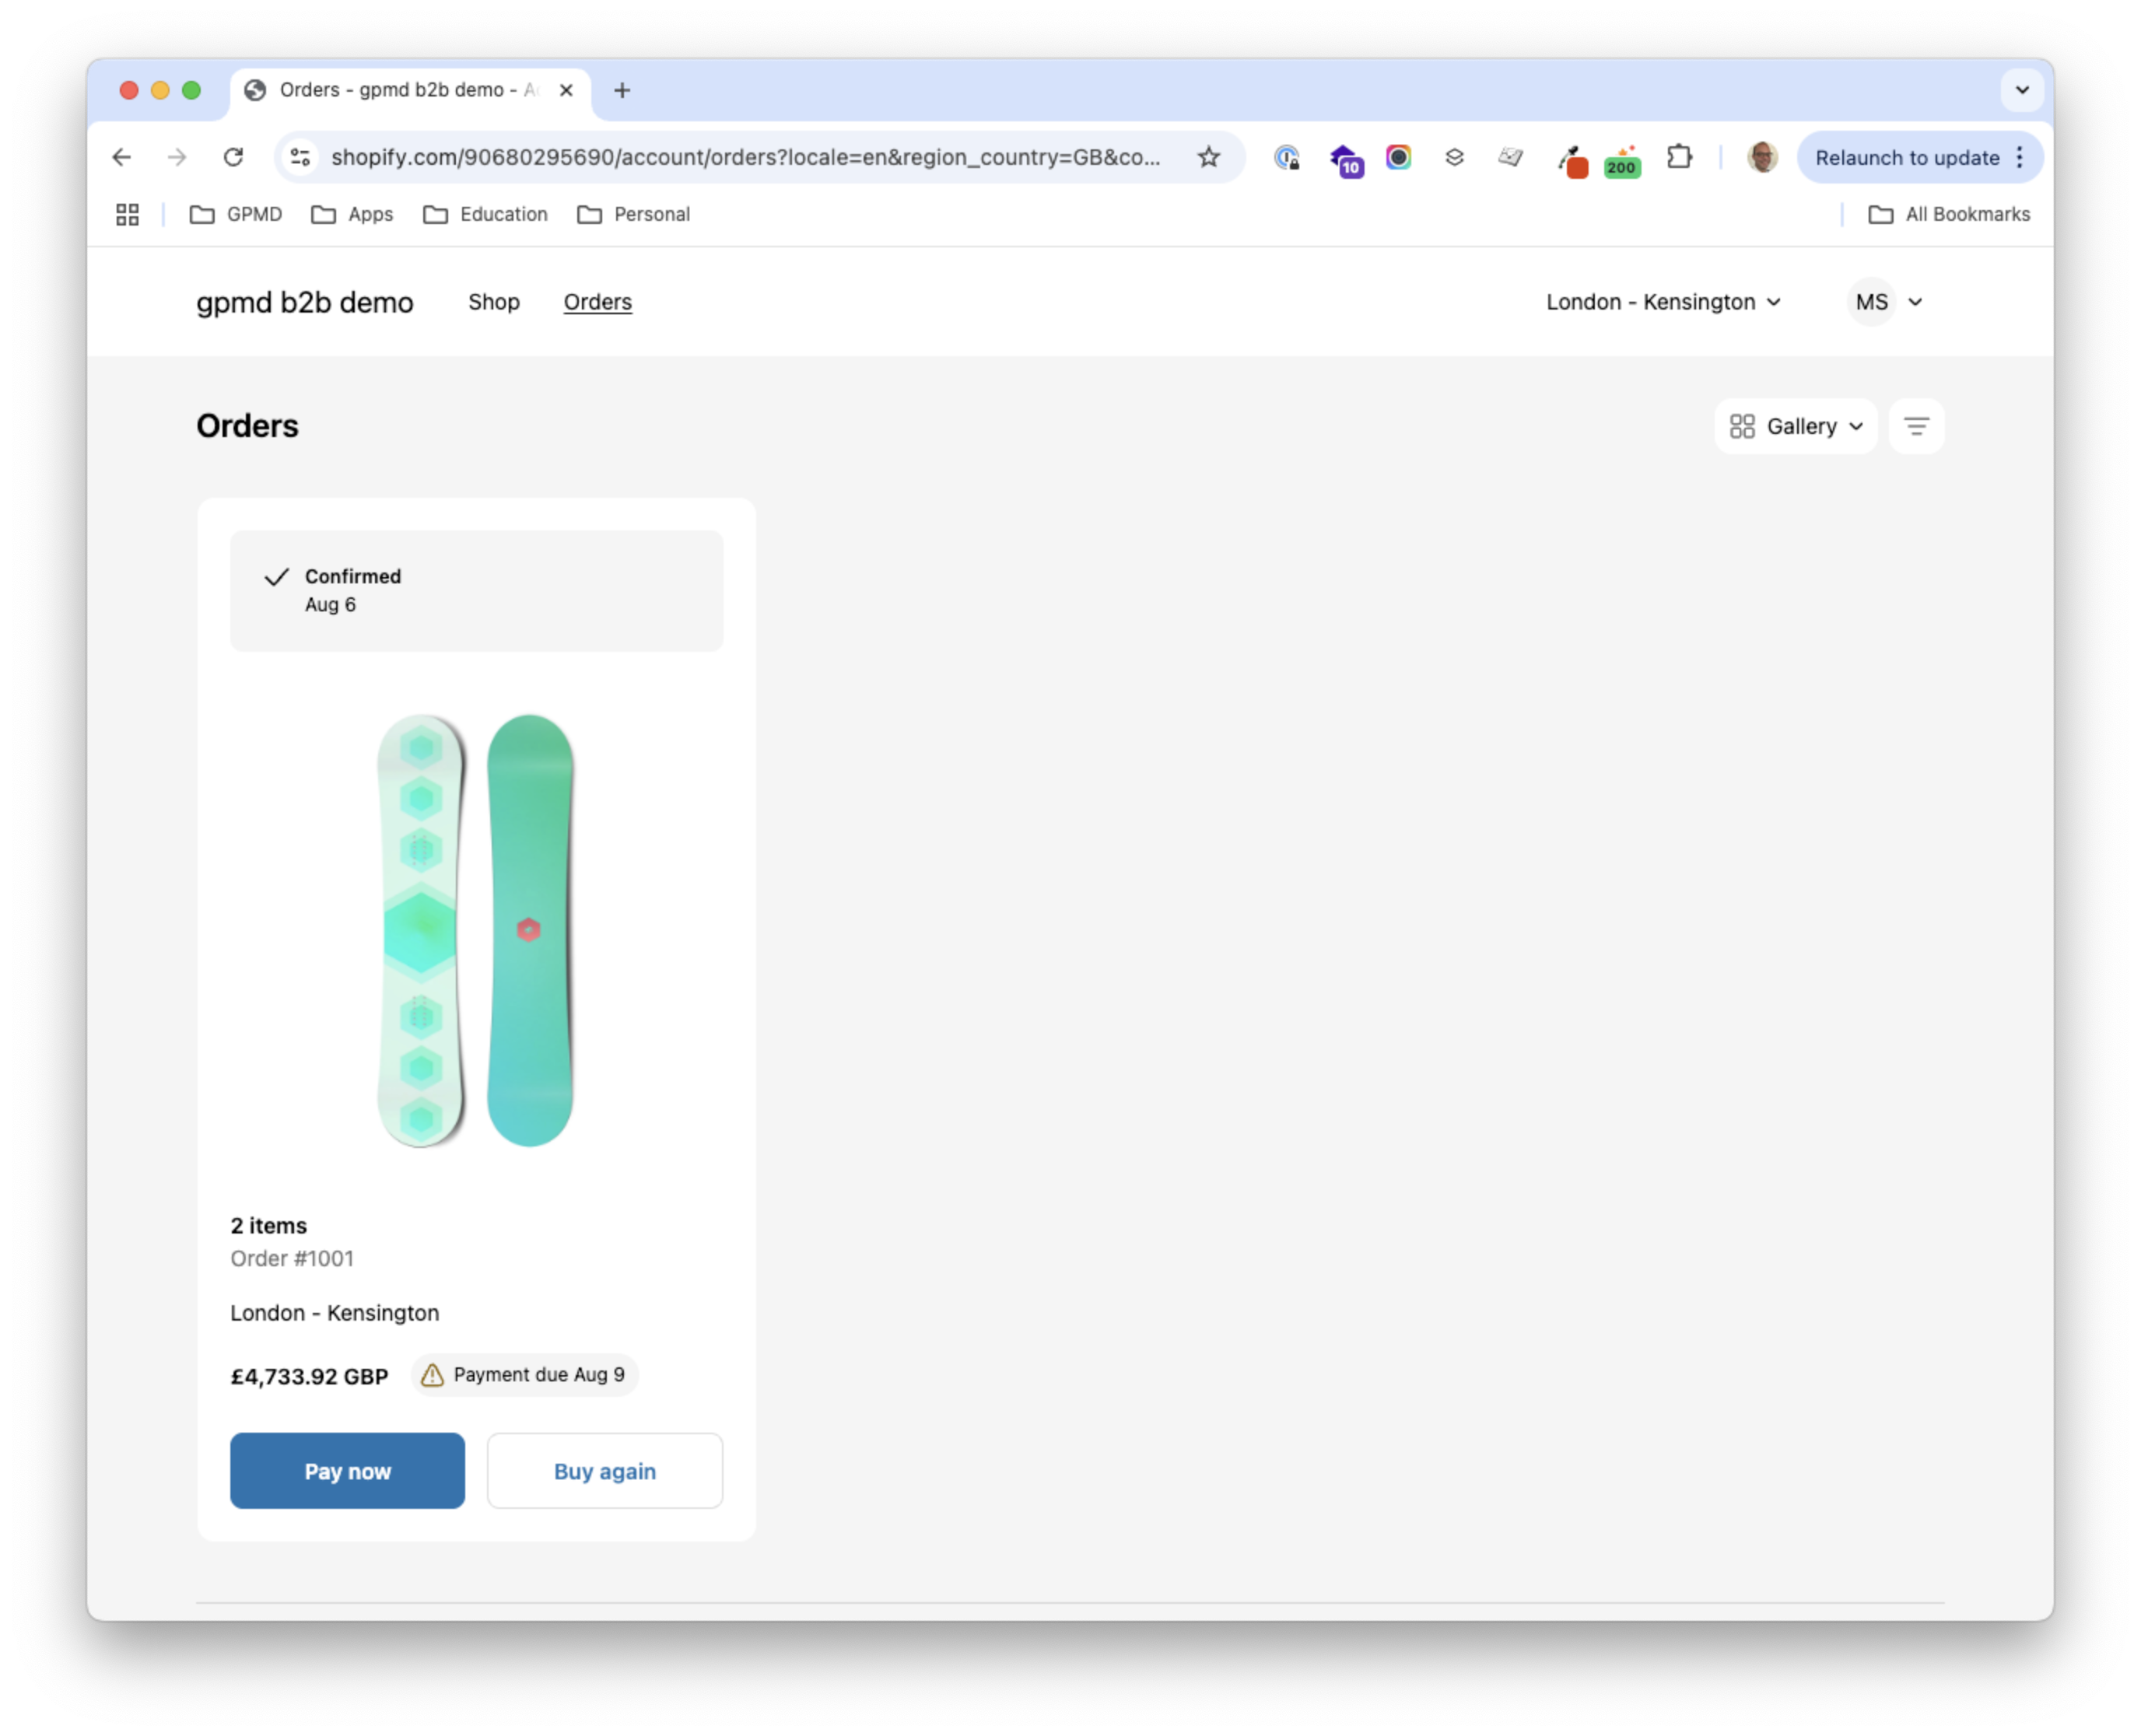
My account
Shopify B2B only works with new customer accounts, here customers can access:
- Orders: view past orders and reorder items
- Company Locations: view company locations, and if a Location Admin all orders for the locations, saved payment methods and edit billing & shipping addresses
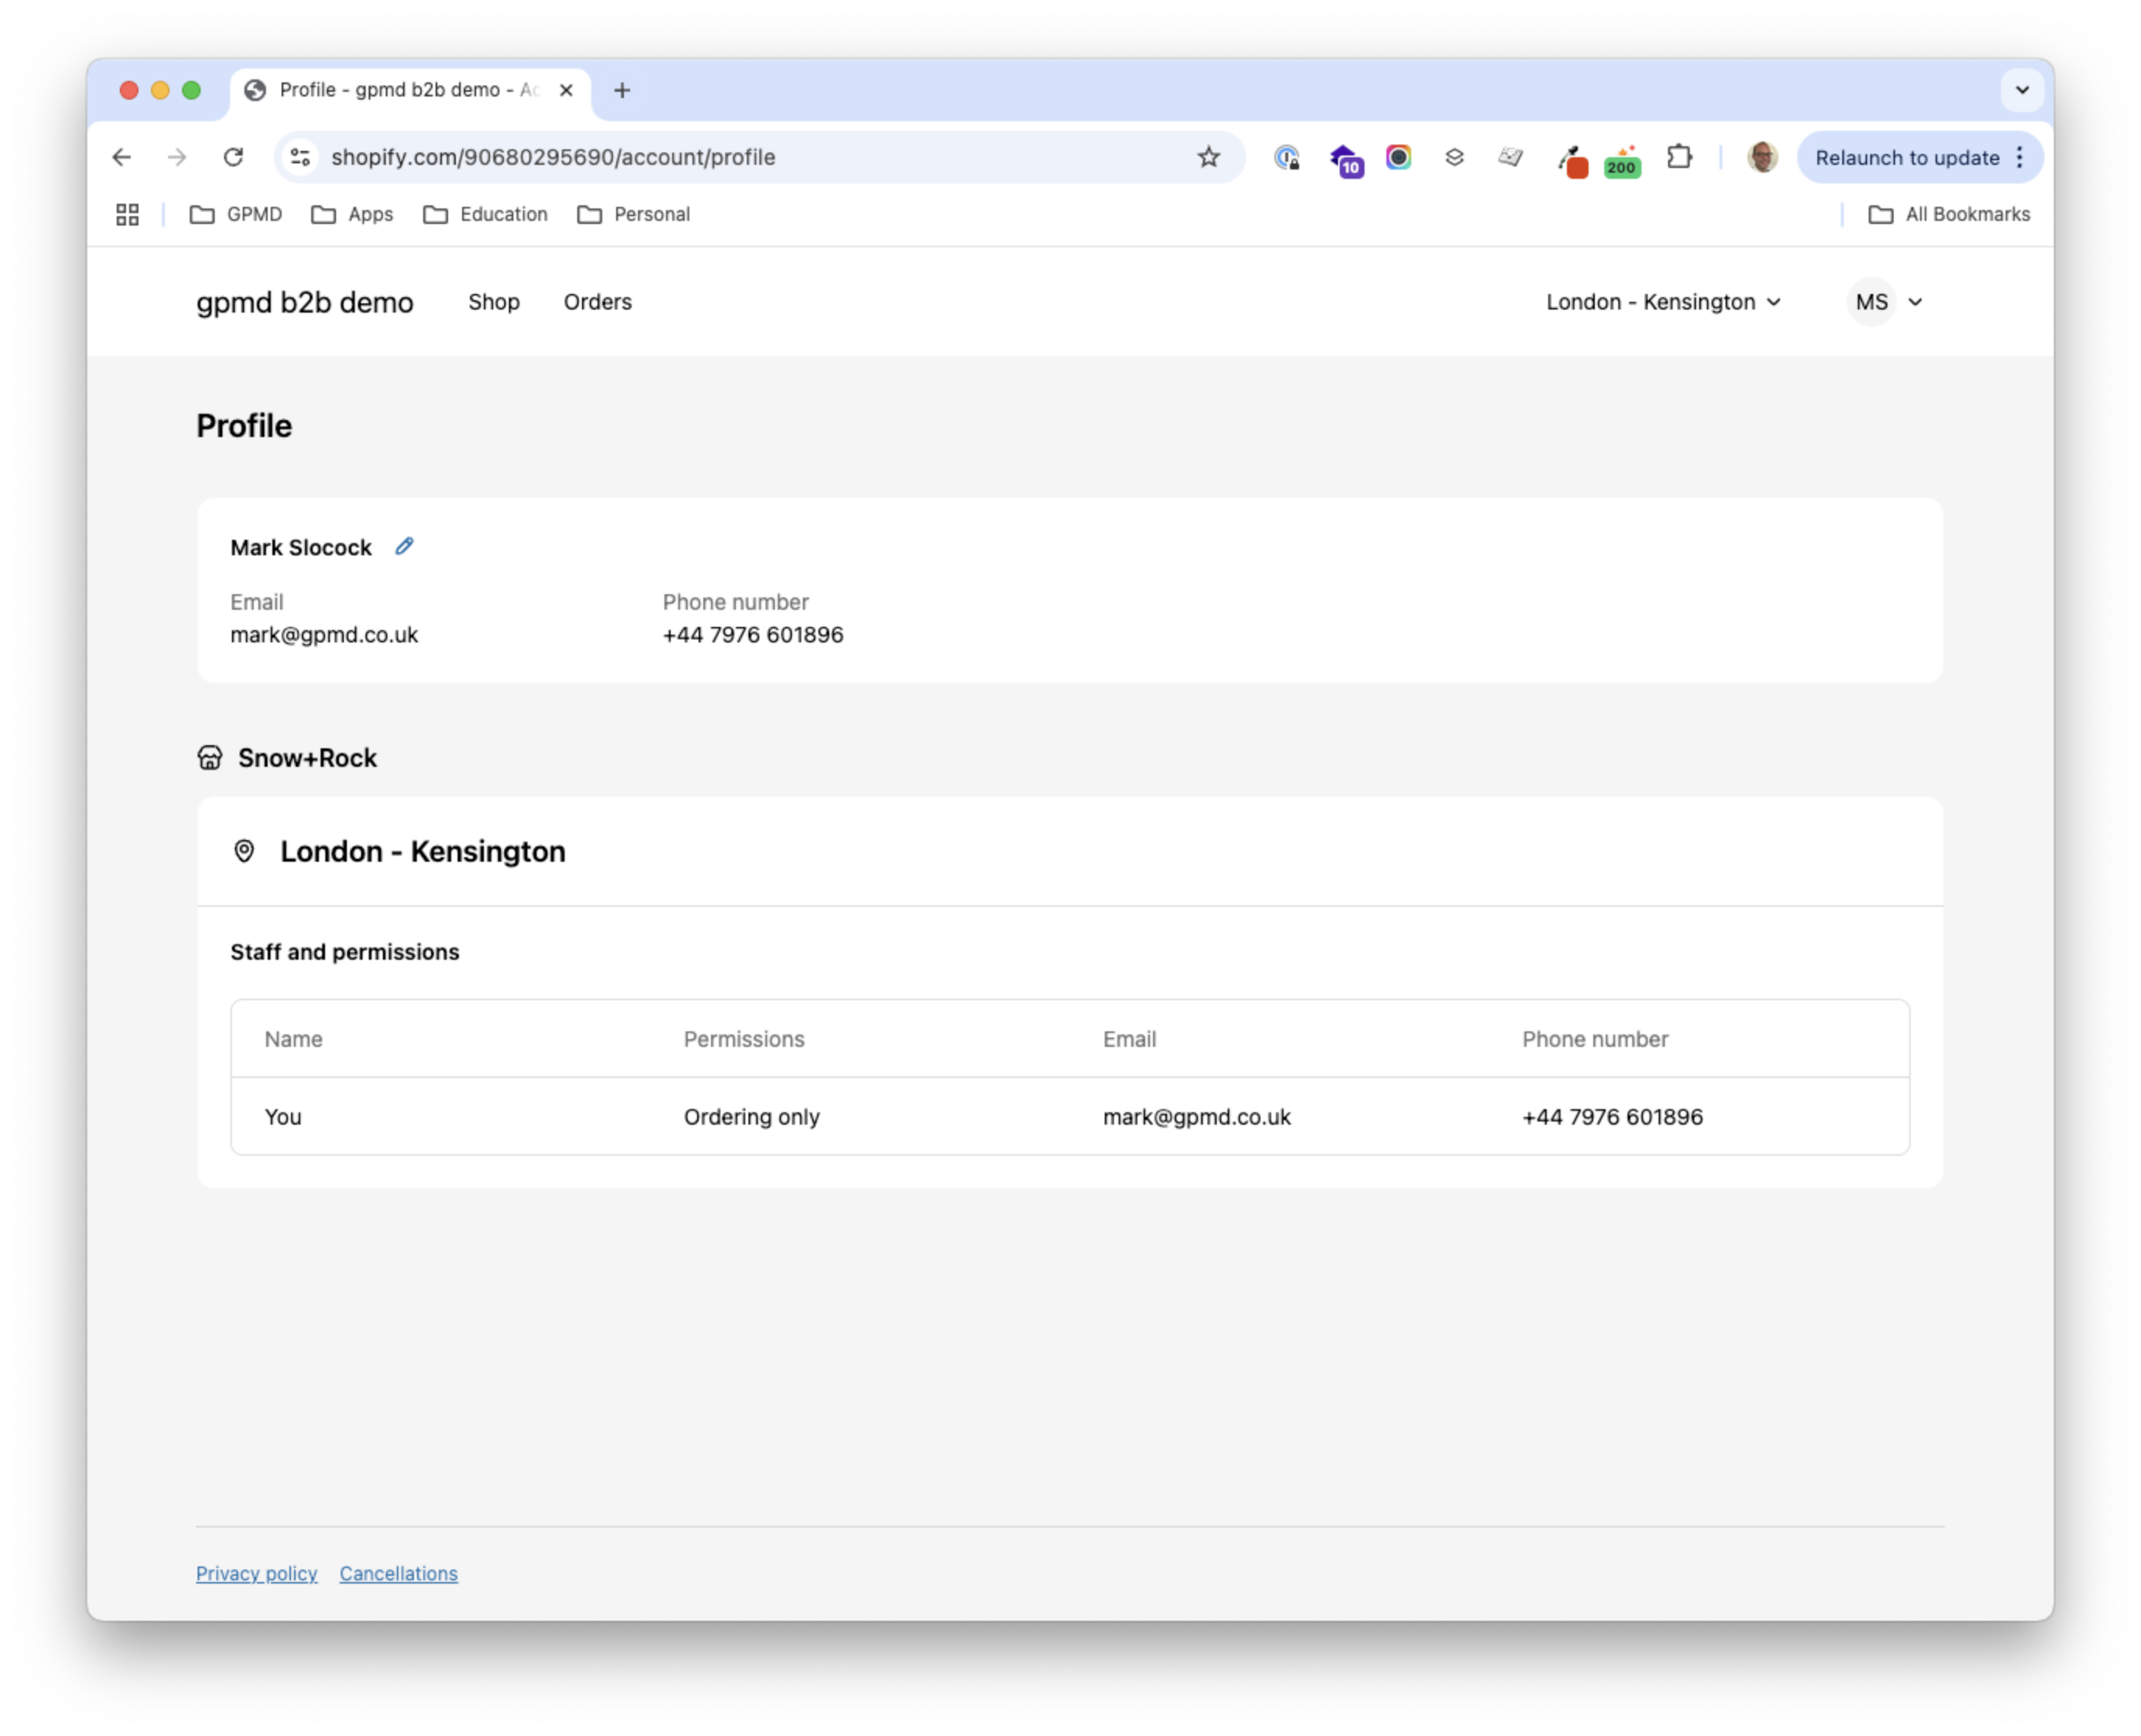
Currently the options you have for customising the My Account area of the are limited to:
- Add your logo, colours & font
- Add custom or private apps to provide additional functionality
In the future we expect these options will be extended in a similar way to Checkout UI Extensions. For now the best way to extend My Account is through a private app.
Common additional b2b features
Application process
Having an application form where information about the customer is collected is common practice, although not required. This requires specific information to be collected before the customer is allowed to place an order:
- Company name and registration number
- VAT Number
- Registered address
- Expected order volumes
A form that collects this information before creating an account requires a simple form added to the theme and this is usually best done by a developer.
Application forms can be simple, collecting the basics only, or a complex multi stage form collecting comprehensive information.
Quick Ordering
Allowing your customers to create orders quickly is a common feature for B2B stores, there are a three ways to speed up the order process:
- Provide a quick order form where customers can add products by using the Stock Keeping Units code (SKU) and defining the desired quantities in bulk
- Allow customers to upload a csv containing the items they wish to order
- Allow customers to create shopping lists that can be added to their carts with a single click
How to implement
- A small custom app, has the advantage of being built specifically got your needs
- An app from the App store (search "Quick Order")
- Recommended App: BSS B2B Quotes & Quick Order
Quotes
A very common feature for b2b is to allow your customers to request a quote for specific shopping baskets of items, this usually requires the following features:
- Add items to a basket and request a quote for the basket
- Assigned Staff can respond with a unique pricing offer for that customers basket
- Staff and Customer can exchange messaging regarding the quote
- Staff can add internal messages (only viewable by Staff) to a quote
- Staff can send a quote to a customer for review
- Customer can reject quote with a message
- Customer can accept quote, checkout and pay for the order
How to implement
- A custom app, however this is not a small app to build so you will likely be better off using a App
- An app from the App store (search "Quotes")
- Recommended App: BSS B2B Quotes & Quick Order
Personalisation
Tailoring the website experience to your customer can be done in many different ways, from simple branding through to a fully unique website foreach customer:
- Branded login screen for a customer
- Branded site header when logged in
- A product catalog unique to the customer (see Catalgos above)
- Content / banners specific to a customer
- Product recommendations based on the currently logged in user of the website
- Show or hide collections based on the currently logged in user
- Create custom dashboards for My account
Loyalty for B2B
Creating programs that encourage and reward loyalty are a very important aspect of any B2B ecommerce operation. Done right these can hugely benefit both the wholesale business and its customers.
There are many different ways to approach this, some tactics we've seen used to great effect are:
- Free gifts and value add giveaways: Adding a free gift either at checkout or as a surprise in the packaging (eg. a free bas of sweets)
- Points, Tiers and VIP perks: Points or revenue based tier systems that provide better pricing or terms to high value customers
- Free Shipping & Delivery: Offering Free or expedited shipping options to high value customers
- Exclusive discounts & pricing benefits: Access to exclusive sale or discount offers (usually in additional to their normal pricing)
- Education & Training rewards: Provide free educational resources of training to customers
- Community & Network perks: Access to a community or network of peers
- Gamification & contests: Offering rewards and prizes to customers based on actions taken
- Cause based benefits: Giving to worthy causes on behalf of your customers
- Paid Loyalty memberships: Customers pay a fee to access benefits and pricing Tiers
Putting it all together and getting Shopify B2B setup
With Shopify you can have a store up and running in minutes, and do a base configuration (including importing products) in a few days. This allows you to review and test your setup quickly so you can see how it works. We suggest you setup your Shopify store as follows:
Initial Setup
- For a dedicated store create a new site from your Shopify Plus organisation admin
- Import an initial set of products (ideally the full catalog, with basic data)
- Setup any companies & locations you want present form the start
- Create one or more product catalogs and assign to your wholesale customer companies (and/or locations)
- For a dedicated store Set up your tax / VAT
- For a dedicated store Set up your payment options
- For a dedicated store Assign the Shopify Trade theme to your store
Discovery
At this point you will have the base wholesale website up and running, you will be able to use the website, login and see catalogs and pricing and place orders.
You can then move on customising the store to your requirements. Before actioning anything its vital that you undertake a detailed Discovery that identifies all the work that needs to be done, typically this would cover
- Any custom features and functions required and how they will be implemented
- Integration with 3rd party systems (ERP or WMS)
- Design & UX requirements
- For platform migrations the data that needs to be migrated (customers / orders / shipments etc)
- Product import and data enrichment
Implementation
The size of the implementation phase will depend on the scale, complexity and maturity of your wholesale businesses. It can range from a few weeks to many months depending on the requirements, larger and mature wholesale business are likely to need a range of complex features. Whereas new wholesale businesses can be up and running in a few days.
Thinking of moving to Shopify B2B?
Book a no obiligation call to expore your options and understand whats invovled.
Book a call with our experts here

