
Since its launch in 2009, BigCommerce has become one of the leading international SaaS commerce platforms. However, one key missing feature was the ability for store owners to quickly and easily manage content across their storefront(s). Anything beyond the most simple theme modifications usually required a developer to make changes. To fill this gap BigCommerce launched Page Builder - an intuitive, drag and drop visual design tool.
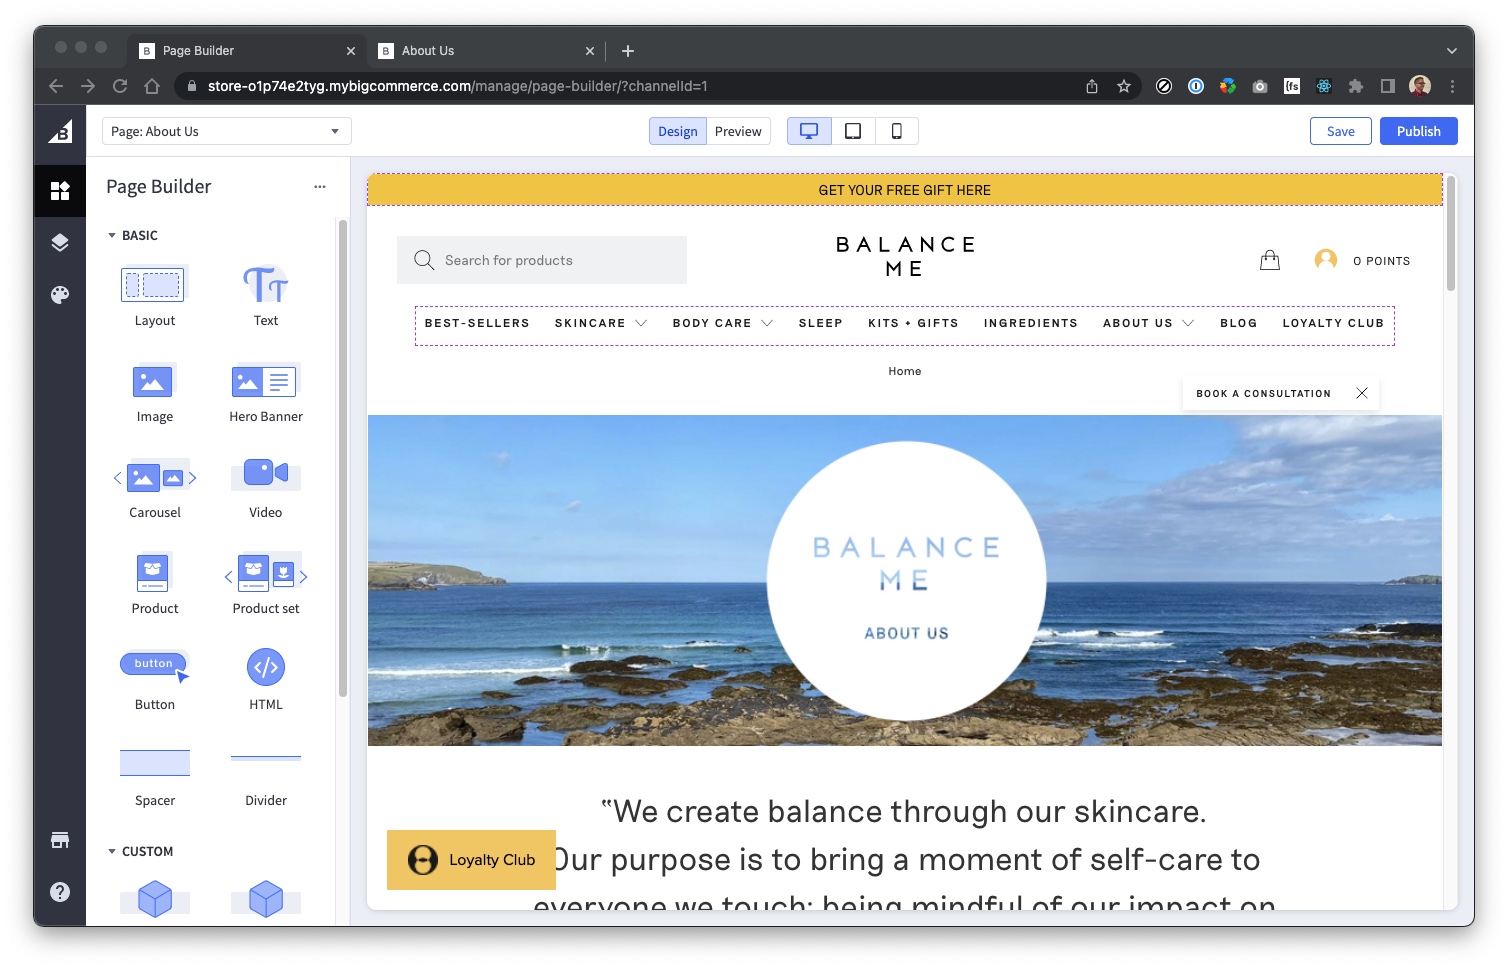
BigCommerce Page Builder
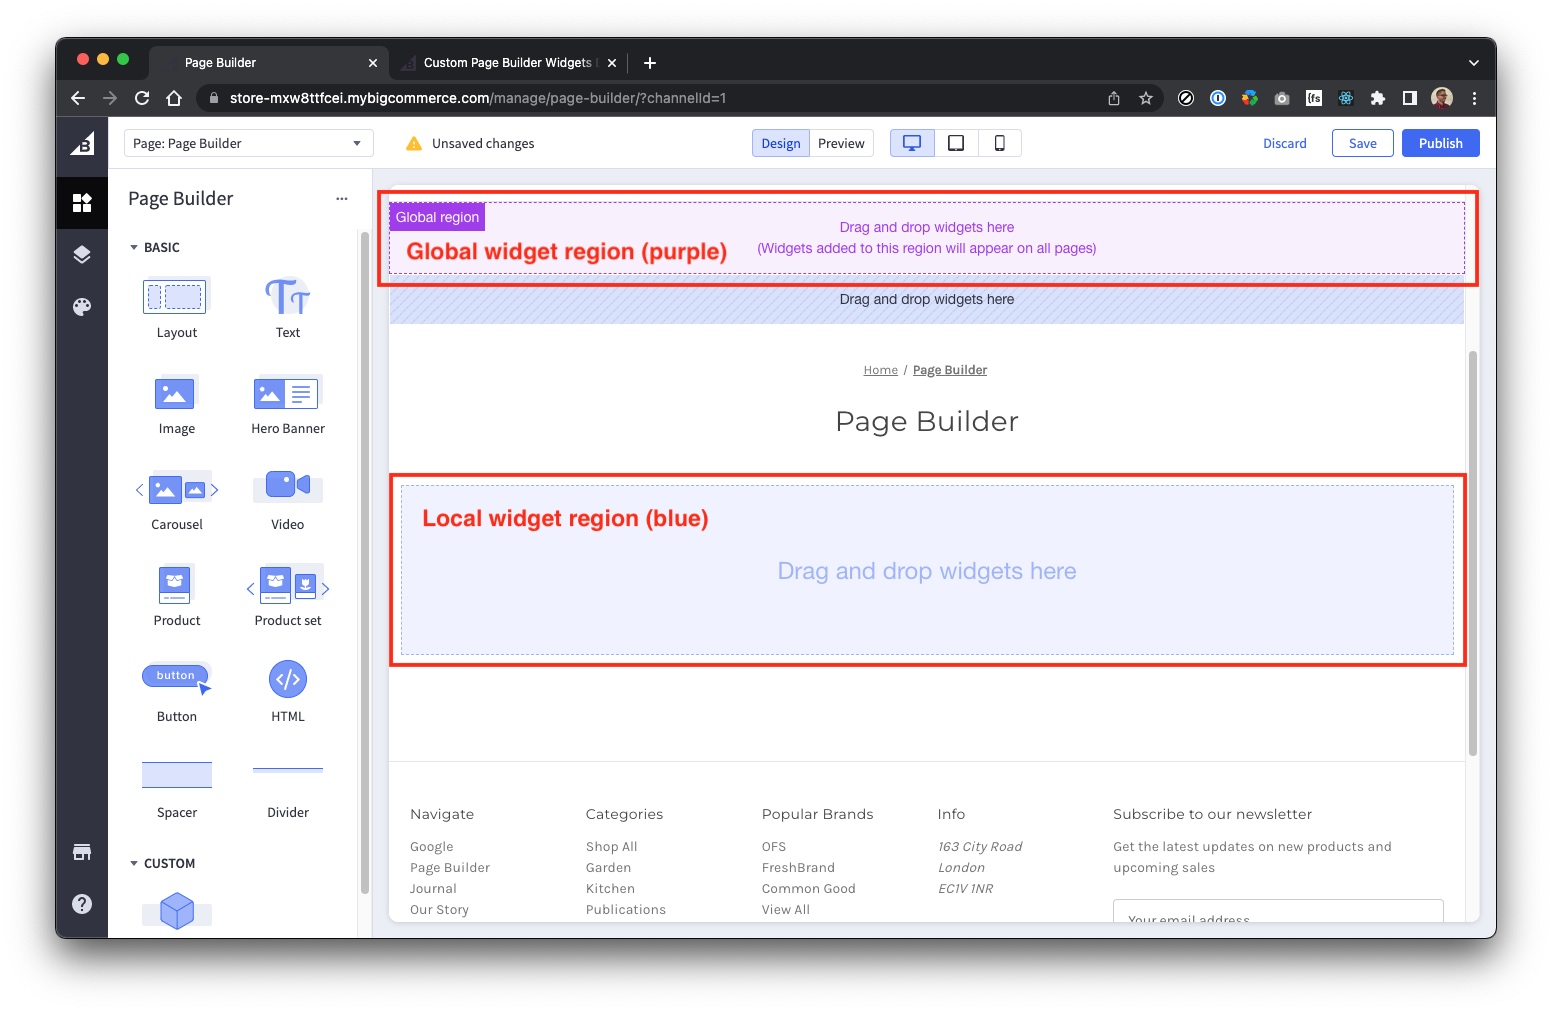
Page Builder allows you to drag-and-drop blocks of content - such as product cards, text blocks, carousels, banners, video, custom HTML etc. - called widgets, into predefined areas on your pages, called widget regions. Widget regions can either be local, or global. Content placed in local regions only appears on that specific page. Conversely, any content placed in a global region will appear across all pages (that contain that global region in their theme template file).
This has had a hugely positive impact on the ability for businesses to create more immersive and personalised content strategies.
"Page Builder has given Balance Me many more options for populating rich content across the site with easy-to-use drag-and-drop functionality. It saves the team a huge amount of time locating HTML blocks in the control panel and updating the code. It also offers a powerful and flexible tool to inject rich, engaging and commercial content at key stages in the user journey."
– Haydn Parks, Balance Me
But whilst what you get out-of-the-box with Page Builder is certainly a game changer, what if you want even more flexibility? This is where custom widgets come in…
How to create custom Page Builder widgets
One of the really fantastic things about Page Builder is the Widgets API. With a little bit of developer experience, it’s remarkably easy to create and manage your own custom widgets, and we’re going to show you how.
Prerequisites
- Access Token: To create your own custom widgets you will need an API `access_token` with `content modify` scope. Click here to view the Store API Accounts documentation.
- Store Hash: You will also need to know your store’s `store_hash`, which can be found by looking at your dashboard URL - Your `store_hash` is the collection of random letters/numbers after the word `store-`. For example, if your dashboard URL is `https://store-abcde12345.mybigcommerce.com/manage/dashboard`, then your `store_hash` is `abcde12345`.
Widget builder cli tool (optional)
You could also install and use BigCommerce’s own Widget Builder CLI tool. However, I found it helpful for me to first learn how to create widgets manually in order to familiarise myself with their structure/schema. Once I had done that a few times I felt comfortable moving on to using the CLI tool, which will save you a little time and effort in the long run.
The basic structure of a widget
There are really only three main elements that make up the structure of a widget template; the name, the template, and the schema:
- The name can be anything - simply describe your widget, e.g. ‘Card Widget’.
- The template consists of the HTML markup and frontend logic (you can use handlebars helpers like you would in any of your theme template files), plus any required CSS or Javascript.
- The schema contains the data structure/user definable input types that you wish to expose in the Page Builder admin interface. For example, colours, padding/margins, text inputs, image upload fields and so on.
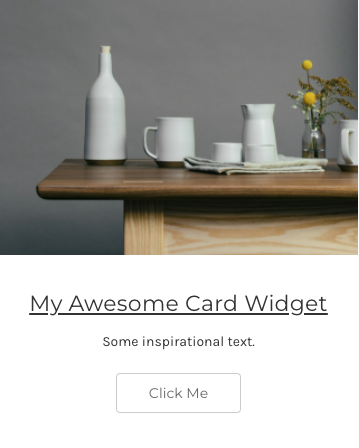
Let's build a simple card widget
For the purposes of this tutorial, let’s take a common frontend component like a card. It will consist of an image, title, text and button.
Name
My main advice around naming your widget is to keep it simple. It can be as long as you like, but after about 11 or 12 characters it will get truncated in the editor and you will only be able to read the full name by hovering over it. In our case, this is perfect:
Schema
If we think about the user definable ‘bits’ of our card widget, we are going to need:
- Image upload field
- Content alignment field
- Title
- Title type (h1-h6)
- Text
- Button text
- Link URL
Following the schema documentation, we would markup the schema like this:
Something to note about the schema, is that the example here is very simple. But once you get to grips with how things work, you will soon learn how to create far more complex widgets, with repeatable sections (e.g. if you wanted to create a custom carousel widget with infinite slides), collapsible sections (to help group your options) and so on. Some great places to look to expand your knowledge are the official BigCommerce Widgets Tutorial, Widgets Code Samples, and Widget UI Schema documentation.
Template
Finally, our template code. Again, this can consist of Javascript, CSS and HTML including handlebars template variables and logic. One requirement to bear in mind is that the template code needs to be JSON encoded, i.e. condensed onto one line, special characters escaped etc. To make it easier to work on, I tend to keep a fully formatted version with all the proper indenting, and then prep it for the widget once I’ve finished making my changes. This does mean keeping two versions of the markup in-sync, but it’s much easier than trying to edit your code when it’s all on one line.
For our card widget our template markup looks like this:
{
"template": "{{#if imageUrl.src}}{{#if url}}{{else}}{{/if}} {{#if url}}{{else}}{{/if}}{{else}}{{/if}}{{#if title}}<{{titletype}}>{{#if url}}{{else}}{{/if}}{{title}}{{#if url}}{{else}}{{/if}}{{else}}{{/if}}{{#if text}}
{{{text}}}
{{else}}{{/if}}{{#if url}}{{#if buttonText}}{{buttonText}}{{else}}{{/if}}{{else}}{{/if}}"
}Publishing the widget
To publish the widget you’re going to need an API tool such as Postman, or Hoppscotch. I use PAW, for Mac.
In your API tool, set your headers to:
Note: The {access_token} is the one you created earlier - see the Prerequisites section above.
Then, setting the protocol type to POST, enter the following URL:
Note: You discovered your {store_hash} earlier - see the Prerequisites section above.
Finally, in the Body of the request, input the widget template code that we created earlier (the name, template and schema). All together it looks like this:
{
"name": "Card Widget",
"template": "{{#if imageUrl.src}}{{#if url}}{{else}}{{/if}}{{#if url}}{{else}}{{/if}}{{else}}{{/if}}{{#if title}}<{{titletype}}>{{#if url}}{{else}}{{/if}}{{title}}{{#if url}}{{else}}{{/if}}{{else}}{{/if}}{{#if text}}{{{text}}}
{{else}}{{/if}}{{#if url}}{{#if buttonText}}{{buttonText}}{{else}}{{/if}}{{else}}{{/if}}",
"schema": [
{
"type": "tab",
"label": "Content",
"sections": [
{
"settings": [
{
"type": "imageManager",
"label": "Image",
"id": "imageUrl",
"default": {
"src": "",
"type": "IMAGE_MANAGER"
}
},
{
"type": "alignment",
"label": "Content Alignment",
"id": "contentAlignment",
"default": {
"horizontal": "center"
},
"typeMeta": {
"display": "horizontal"
}
},
{
"type": "text",
"id": "title",
"label": "Title",
"default": ""
},
{
"type": "select",
"label": "Title Type",
"id": "titleType",
"default": "h3",
"typeMeta": {
"selectOptions": [
{
"label": "H1",
"value": "h1"
},
{
"label": "H2",
"value": "h2"
},
{
"label": "H3",
"value": "h3"
},
{
"label": "H4",
"value": "h4"
},
{
"label": "H5",
"value": "h5"
},
{
"label": "H6",
"value": "h6"
}
]
}
},
{
"type": "text",
"id": "text",
"label": "Text",
"default": ""
},
{
"type": "text",
"id": "buttonText",
"label": "Button Text",
"default": ""
},
{
"type": "input",
"id": "url",
"label": "URL",
"default": ""
}
]
}
]
}
]
}
Once you are happy that everything is present and correct, call the URL and, all being well you’ll get a 200 OK response. You have now created your first widget!
Testing the widget
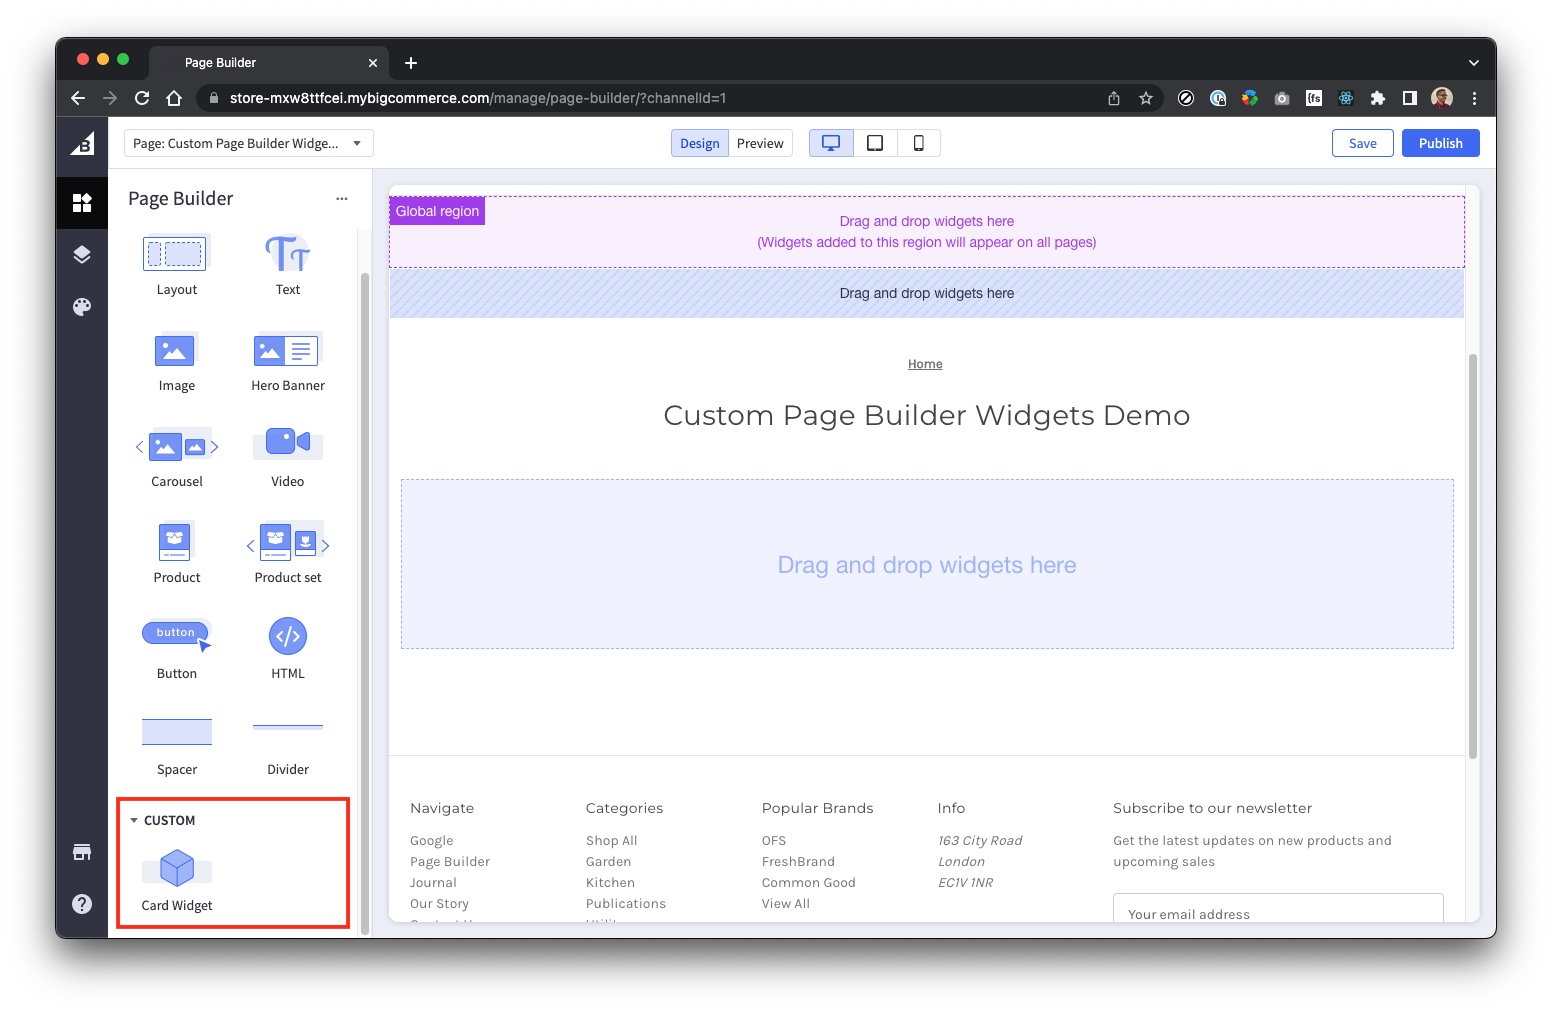
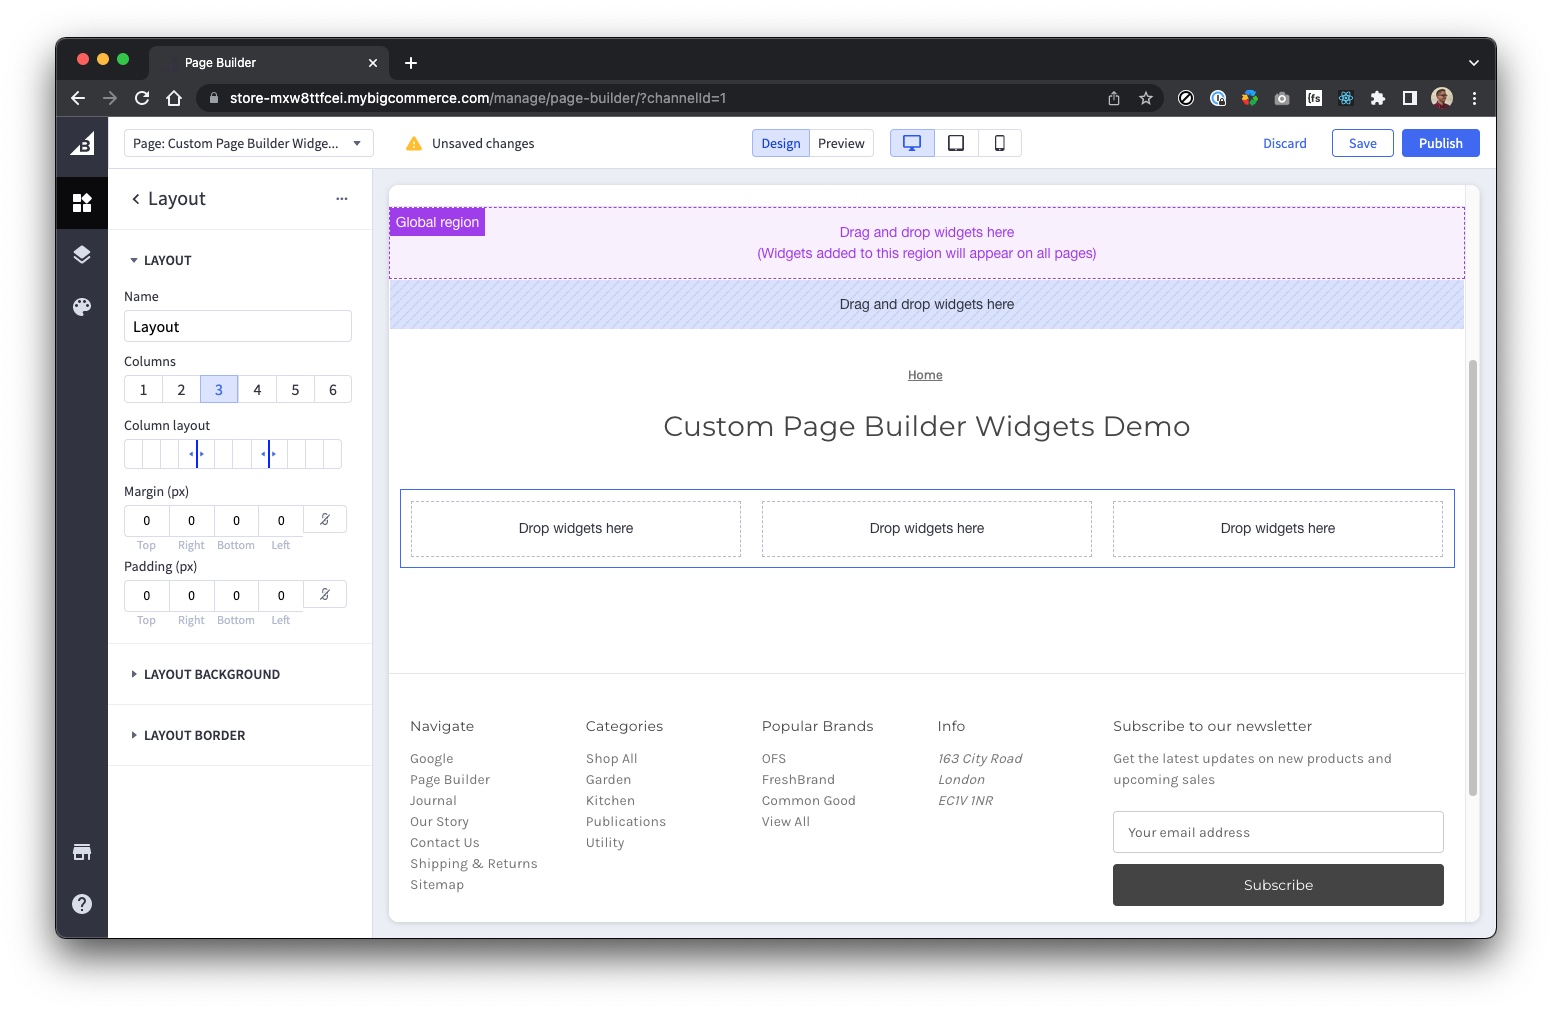
To test the widget, open your BigCommerce admin dashboard and navigate to Storefront > Themes, and click the Customise button on the active theme - this will open Page Builder. From here you should be able to see your custom widget in the Page Builder panel on the left in the ‘Custom’ section. Navigate to the page you would like to edit using the dropdown menu in the top left corner (if you would like to work on a new page, you will need to create it first via Storefront > Web Pages).
Before I add our new widget to the page I’m going to first use the Layout widget to create some columns (or the Card Widget would span the whole width of the page, which we probably don’t want). Drag-and-drop the Layout widget onto the main widget region, and set the columns to the desired amount (3 for example).
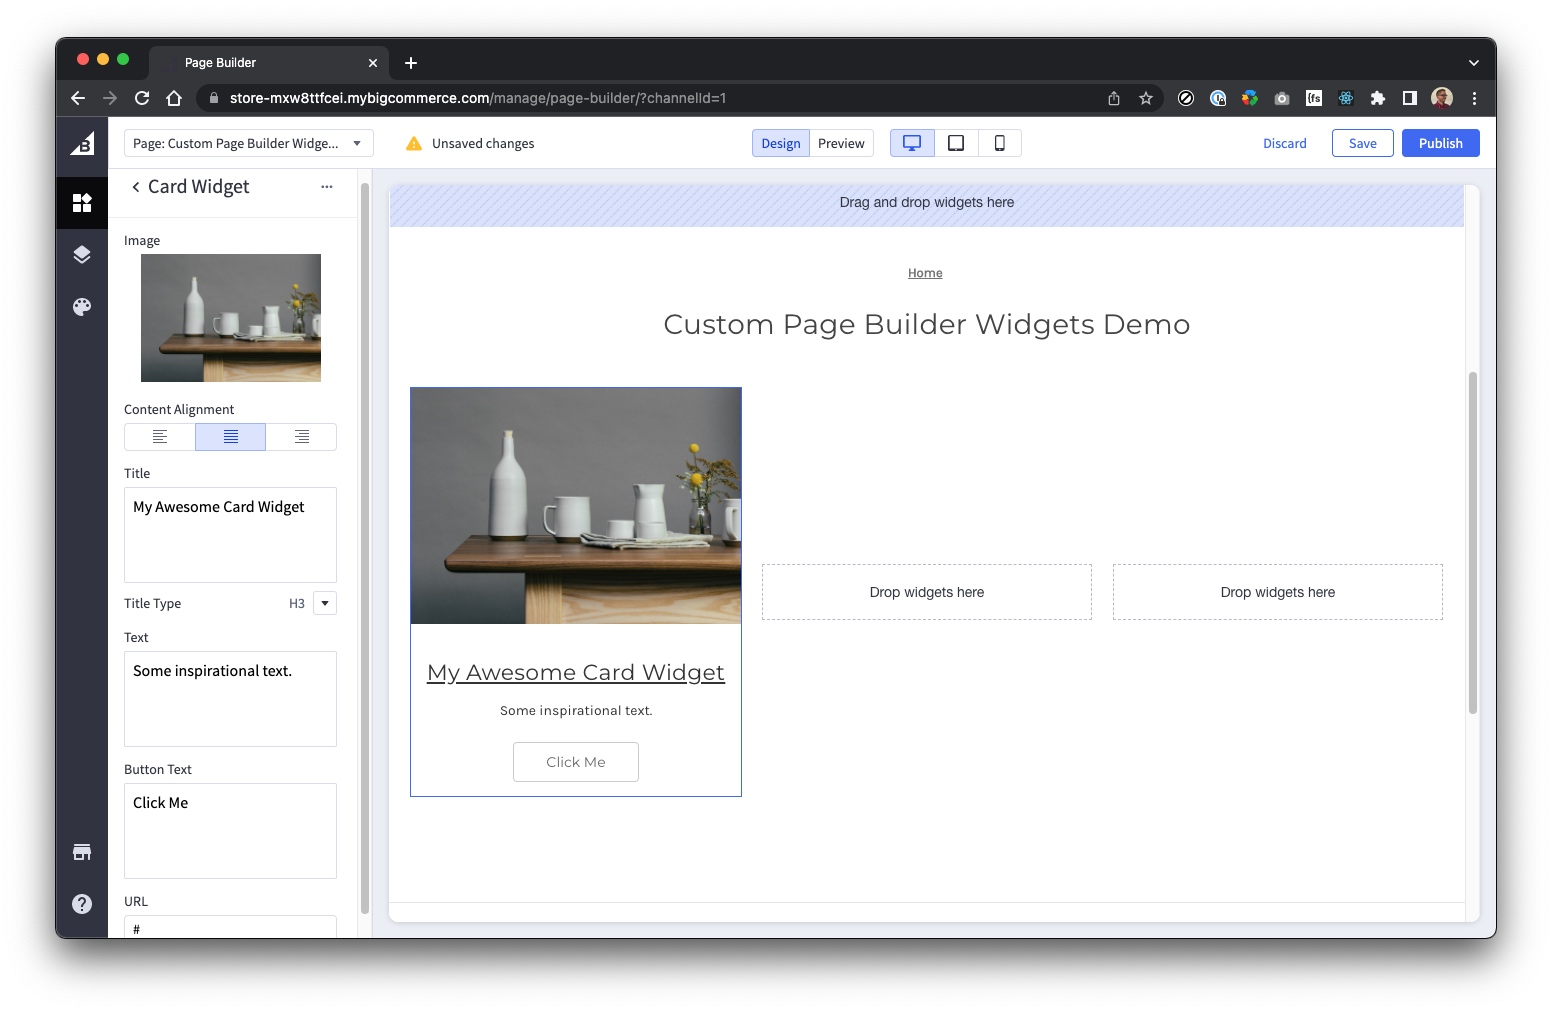
In order to add an instance of the new widget to your page, simply drag-and-drop it onto one of the newly created columns, at which point the left panel will expose the user definable options you added to your widget schema. We haven’t yet entered any content into the widget’s input fields, so there’s nothing much to see (you can enter defaults in your widget schema if you wish).

As you start to edit the inputs, the preview on the right will update automatically.
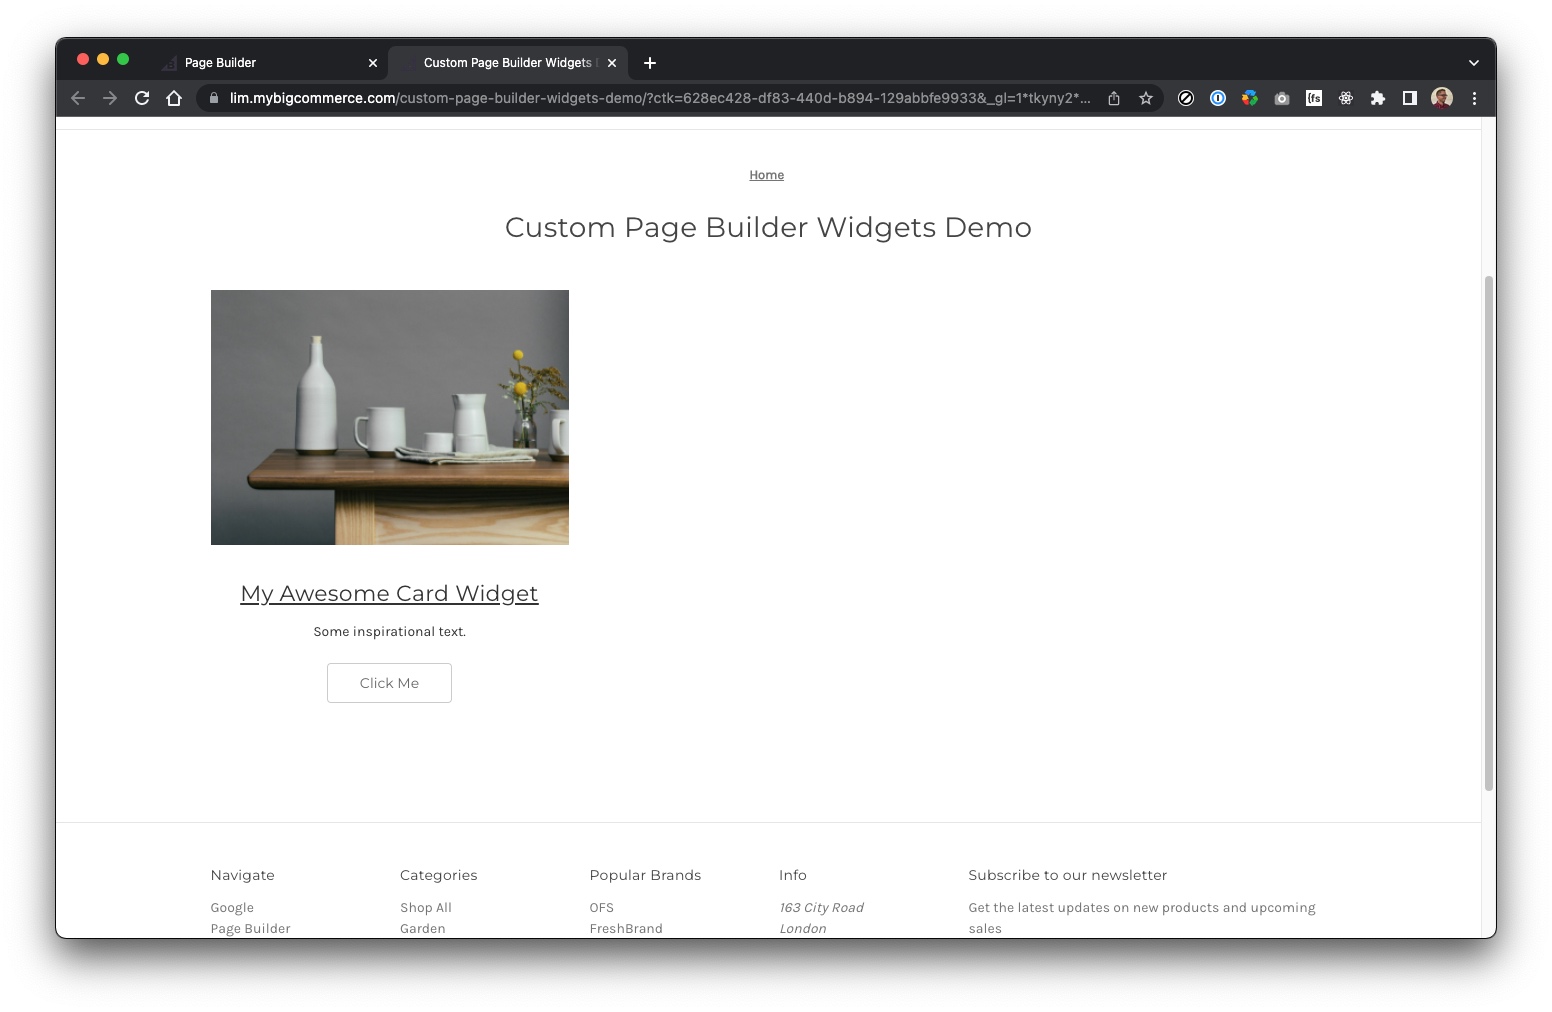
At this point you have the option to either Save your changes (to continue working on them later), or Publish the changes straight away, in which case they will be visible immediately on your storefront.
Updating a widget template
Updating a widget template is extremely similar to creating one.
Get all the widget templates
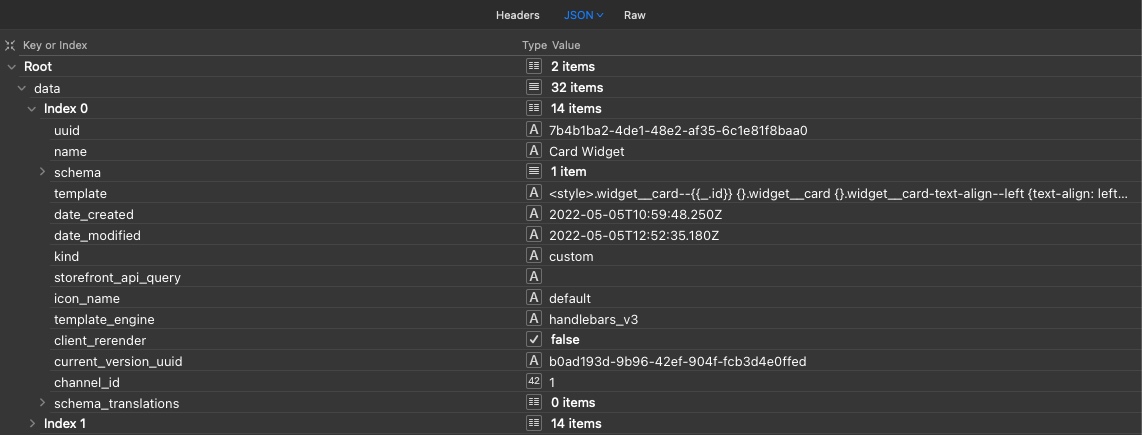
First you will need to get the unique ID (UUID) of your newly created widget template. You can do this by entering a GET request in the following format:
Don’t forget to add your own store hash and set your headers as before. Browse the returned result (which contains all the widget templates on your site) for your new widget - look for the name. The widget template’s UUID should be directly before the name entry, and will look something like ‘7b4b1ba2-4de1-48e2-af35-6c1e81f8baa0’ (see below).
Update the widget template
Once you have the UUID, enter a PUT request in the following format:
In the Body, you should put your updated widget template JSON (name, template and schema), and don’t forget your store hash and headers as before. Call the PUT request, reload Page Builder, and you should see your changes.
Deleting a widget template
If you want to delete a widget template, again, it is very simple and similar to what you have done before. Call a DELETE request in the following format, adding your store hash, headers and widget template UUID as before:
Please Note: Take care when deleting widget templates. You cannot reverse the action, and you will lose any content on the site that was created using that widget.
Conclusion
Hopefully you have found our Page Builder custom widget tutorial useful and informative. In it we learned the structure of a widget, how to create the template markup and schema, and how to publish, update and delete a widget template. Although our example card widget was fairly basic, I’m sure you can see how easy it is to create powerful and flexible solutions for your BigCommerce clients. By leveraging the power of Page Builder and custom widgets, you can enable them to take control of their brand by providing unique shopping experiences for their customers, which will keep them coming back for more.
If you would like to see some real-life examples of custom widgets in action, take a look at one of our clients, Balance Me. They have built most of the content across their site (including content on their product pages) using Page Builder and custom widgets.

Main image credit: BigCommerce


