
Working with Magento can be a daunting task for beginners or non-developers, but it needn't be. Following the simple instructions below you'll see how easy it is to set up a custom block module and then display it on the front-end of your site.
Step 1: Global Config
Create a global configuration XML file for your modules (throughout the example I'm using GPMD as my namespace, but obviously you can use whatever you like):
In its most basic form this file would contain the following code:
Step 2: Directory structure
Next, set up the directories for the module:
Step 3: Module Config
Create a config file for the module:
Note - This file must be called config.xml
In its most basic form this file would contain the following code:
Step 4: Block class
Create the class file for your custom block:
In its most basic form this file would contain the following code.
Note - You can use this file to extend the functionality of Mage_Core_Block_Template or other Magento classes.
Step 5: Template File
Create a template file that will be used to output your custom block data on the front-end:
The contents of this file will depend on what you wish to achieve, but as basic test that things are working you could simply output some text like this:
Step 6: Display the block
This can be done in one of two ways - In one of the layout XML files, or programmatically.
For example, in...
This code is telling the custom block to display before the main content block. You can change the position by altering this parameter. For example:
- before="-" positions the block before all other blocks
- after="-" positions the block after all other block
- before="some_block" positions this block before another block with name="some_block"
- after="some_block" position this block after another block with name="some_block"
Alternatively you can output the block in one of your theme template files, in footer.phtml for example, like this:
One of the benefits of defining your custom block as a module in this way, is that it can be easily disabled in admin:
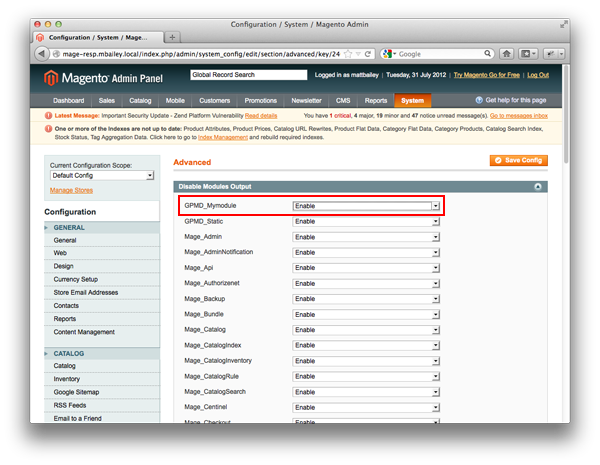
And there you have it - a simple custom block module.


Keen to learn more? Get in touch
We're here to answer your questions and discuss any potential projects.